


The Image Browser
The Image Browser is used to navigate through your folders and display your images.
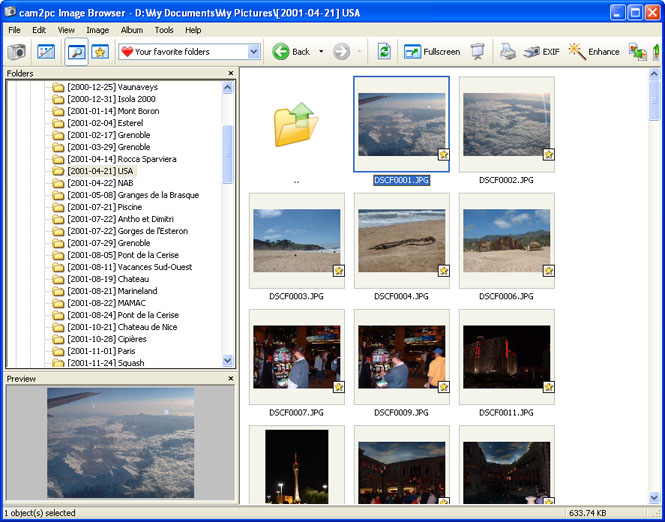
Notice in the tree (on the left side) how all my images were organized using cam2pc
The Image Browser is really simple: on the left side appears a tree showing all drives (local and network). For easier access, the tree also shows a shortcut to your "My Documents" and "My Pictures" folders. You can navigate through the directories as you would in Windows Explorer. On the right side is the Image Browser which displays thumbnails for all the images located in a selected folder. Simply click on a folder in the tree and the Image Browser will be updated. You can change the type of files listed in the Image Browser in the options: you may choose between Images only, Images and movies or All files. If you choose All files, then you can double-click on any file to have it run its associated application. Under the tree is a preview area which will display the current image or movie selected.
You can switch the thumbnails view to a details view. In that case your images will be listed and you will be able to quickly see important information about each image: file size, image dimensions, image format and EXIF information (such as Exposure, Focal Length...). You can customize the columns you want to display in the details view by right-clicking on the column headers.
By default, thumbnails of the Image Browser are cached on disk. The first time you visit a folder, cam2pc has to create a thumbnail for every image in that folder. The process is fast but can take some time if there is a lot of images. The next time you visit the folder, cam2pc will use the thumbnails stored in its database and therefore all the thumbnails will appear very fast.
You can change the respective widths of the tree and Image Browser by dragging the vertical bar that separates them. You can also hide the tree in the View menu and have the Image Browser occupy the whole width of the window. In that case you might also want to enable the display of folders in the Image Browser so you can still easily navigate through your folders.
If you right-click on a folder in the tree, a contextual menu will appear offering different choices like creating a sub-directory to that folder, renaming it or deleting it.
You can also force the update of the thumbnails of that particular directory. In that case, cam2pc will simply throw away the thumbnails it already has for the images and create new ones.