CAM2PC - Buildiwg
How to build your own Instant Web Galleries
To create your own Instant Web Galleries (IWG) the main prerequisite is to be familiar with the HTML language. Web pages are built using HTML and there is no other solution than knowing HTML to build IWG. If you want to learn HTML, you can use this tutorial at the W3 Schools.
You will also need one tool to ease the process. It has been developed specially by nabocorp to create IWG : download iwgbuild here. Please be aware that this tool requires Miscrosoft's .NET framework to run. You can download the .NET framework by using Windows Update feature or by going to this page.
When building an IWG it is recommended to work directly in cam2pc's installation directory. This way it will be more easy to test your IWG. If you used the default installation folder, cam2pc is installed in C:\Program Files\cam2pc. In this directory there should be a directory called webgal. All IWG related files are located in this folder. When in this tutorial you are told to save a file, you should save the file in this directory unless explicitely specified. Also it is recommended to prefix all the filenames of your IWG with the name of the IWG. In our case we are going to create a new IWG called "ABC Blocks" so we will make sure all the filenames start with abc. This will make things more clear when sorting out the contents of the webgal folder.
First let's gather some graphics for our template. We want to make a template to publish pictures of a child so we need some ABC Blocks and a nice gradient background. Right-click on the images and use Save Picture as... to save these files.


Next things we need are HTML templates. We will need two templates : one for the index pages and one for the image pages. If you do not use index pages then of course you can skip everything related to the index pages in this tutorial. Download the files here and here. You may need to right-click on these links and use Save target as... to save these files. These HTML templates will be reused as many times as necessary: if your IWG holds 12 images, then 12 different pages will be created from the image page template (one for each image).
Open both files in your favorite text editor so we can have a look at them. As you can see they look very similar and are pure HTML files but for some exceptions. Here are the things that need to be hilited in these files:
- The title of the document (between the <title> tags) is a special tag named <cam2pcTitle>. This special value will be replaced when the IWG will be created by the title of your gallery.
- The images used (our blocks and gradient background) are used in the props directory (img src="../props/abc.gif"). The props directory is a special directory created by cam2pc when generating your IWG. Its purpose is to hold all images and other decorations used in your IWG. Note that you could have access them directly from the same directory of the pages but this makes the folder hierarchy clearer.
- You can note that we reuse our special tag <cam2pcTitle> to put a written title in the document between the <h4> tags. In fact you can place this special tag as many times as you want in your IWG.
- If you look at the abc_idx.html file you will notice a new special tag: <cam2pcIndex>. This special tag will be replaced by all the HTML code needed to display the index of your IWG.
- If you look at the abc_img.html file you will notice a new special tag: <cam2pcImage>. This special tag will be replaced by all the HTML code needed to display an image in your IWG.
All the rest of the code is vanilla HTML and is here just because we want our pages to be layed out this way. Unsertanding this is just a matter of HTML skills and therefore will not be detailed in this tutorial.
Next thing we need is to tell cam2pc how we want to create our IWG: how we want to layout our index, do we want drop shadows or not, what type of caption we want to use for the images... For this we will use cam2pc and its Custom Web Gallery feature. Launch cam2pc, make sure you have at least one image in your album and launch the Custom Web Gallery feature. We will use only four tabs in this dialog: Images, Index 1, Index 2 and Pages.
- Click the File button at the bottom left and choose New. This will make sure we start with a fresh template.
- Go directly to the Images tab. Here you can set the options the way you want them. We will keep the defaults but you can modify any option here. Do not forget to click the Borders buttons if you want to add drop shadows or nice borders. As we are using a gradient background we cannot use drop shadows as drop shadows can only be used on plain backgrounds.
- Again we are not going to modify the values in the Index 1 tab but you may want to do so when creating your very own IWG. You can even change the navigation buttons if you want.
- In the Index 2 tab we do not specify that we use a template for index pages although it is the case: when creating IWG this is automatically taken care of by cam2pc. Nevertheless, check the Advanced options box, you should see some more values appear. Modify the cell border and set it to 0.
- On the Pages tab we are going to modify some values. Click the Navigation... button. In the new window uncheck the List item. Click OK. Back in the Pages tab: in the Caption category, choose EXIF summary for the type. Then click the Customize... button and make sure Filename and Date Created are checked. All other fields should be unchecked. Again in the Pages tab we do not specify a template for the same reason stated above.
We are now done so click the File button at the bottom left and click Save. A file dialog should appear : name the file abc (.wgl extension will be automatically added) and save it in the webgal folder of the cam2pc installation folder. You can now close the Custom Web Gallery window.
We are now in the final steps. Launch iwgbuild downloaded above. Fill the title of the IWG. This is a short description so let's use "ABC Blocks" for this one. Then for file, click on the button with the folder icon and select the abc.wgl file we have created previously. For the preview as there is a bug in cam2pc 4.3, you must select any image file. If you leave it empty cam2pc 4.3 will crash. You can use this preview. To make a nice preview, take a screenshot of Internet Explorer displaying your finished gallery and resize the image to 150 pixels wide. Disable all the toolbars in Internet Explorer before taking the screenshot. Save it as a JPEG file with a quality of 85 and it should be OK. Then check the Index and Pages boxes in the Templates section. Click the buttons and browse for the abc_idx.html and abc_img.html files. The last section is used to tell cam2pc to copy files from its installation directory to web gallery. Remember that we used the ABC blocks image and the gradient background image from the props directory? This is here that we tell cam2pc to copy these files into the props directory. Click the Add button. You can choose the destination directory:
- Root: this is the root directory of your root gallery. This is where the index.html file goes for instance.
- Thumbs: this is where all the thumbnails images are created.
- Images: this is where all the images are copied or their scaled version created.
- Pages: this is where all HTML pages (indexes and image pages) are created.
- Props: this is folder generally used to hold all logos, images, buttons...
Once the you have chosen the destination, choose the file to copy to. First file to copy is abc.gif. Click OK and then repeat the process for abc-back.jpg. If you used customized navigation buttons then you should also add them in the File copy list. Navigation buttons are by default accessed from the props directory so you should copy each button image to the props directory. Once this is done click on the Save button. Name your file abc (.iwg extension is automatically added) and save it in the webgal folder of the cam2pc installation folder.
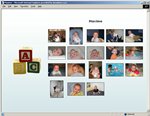
Now run cam2pc, put some images in the album and click on launch the Instant Web Gallery feature. Your new ABC Blocks template should be listed. If you select it you should see the preview. Generate the gallery and voila!
Although this process can seem long, you can always start from existing templates and modify them to fit your taste. Both the Custom Web Gallery and iwbguild can load files, modify them and save them to a new filename. So you can easily load the IWG templates shipped with cam2pc and modify them to create new customised IWG!